Wednesday, December 21, 2016

Single Page Application (SPA) for Enterprise App (Angular2 & WebApi) -

Single Page Application (SPA) for Enterprise App (Angular2 & WebApi) - Part 1 - Overview


18 Dec 2016 CPOL
How to build the SPA for enterprise application using Angular2 and WebApi (RESTful)

Other Articles in the series

  1. Overview
  2. Add new Permission
  3. Project structure
  4. Multi-Languages (i18n)
  5. DI & IoC - Why and Why not?
  6. RESTful & WebApi
  7. Manage Application Lifecycle
  8. Build & Deploy Application

Introduction

The first thing, I would like to share to you is "We did not learn technogies, we learn how to use technologies for our business".
Note: In this code, we use Relase Candidate version of Angular 2
Nowadays, with growing of web development, more and more desktop applications (such as HRM, CRM, Payroll, ...)  were migrated to web application.
So the web application can utilize much benefit from web environment. This is easy to search the pros and cons between web application and desktop application on the internet, so we will not discuss here.
Purpose of series of articles will introduce you how did I organise the project for those types of application.
Some highlight technologies:
  • Angular2 (typescript)
  • WebApi (RESTful)
  • Entity Framework
  • Bootstrap
  • IoC
  • Multi-Layer architecture
  • Modular your Application
  • Multi Languages
  • Design Pattern (Unit Of Work, Repository, …)
  • SOLID principle
  • Gulp
  • NodeJs
There are many mistake and improvements need to be done so far.

How to get the code

Checkout the code at https://github.com/techcoaching/TinyERP.git

How to run the code

The code was organized in 2 folders:
  • Client: this is client code written by typescript using angular2 framework.
  • Api: this is server side code where handles request from client.

Run client side:

  1. To run the client side code, please check and install if missing:
  1. Run the app
- Open command prompt and go to the root folder of client:
- Type “npm install” for installing missing nodejs packages.
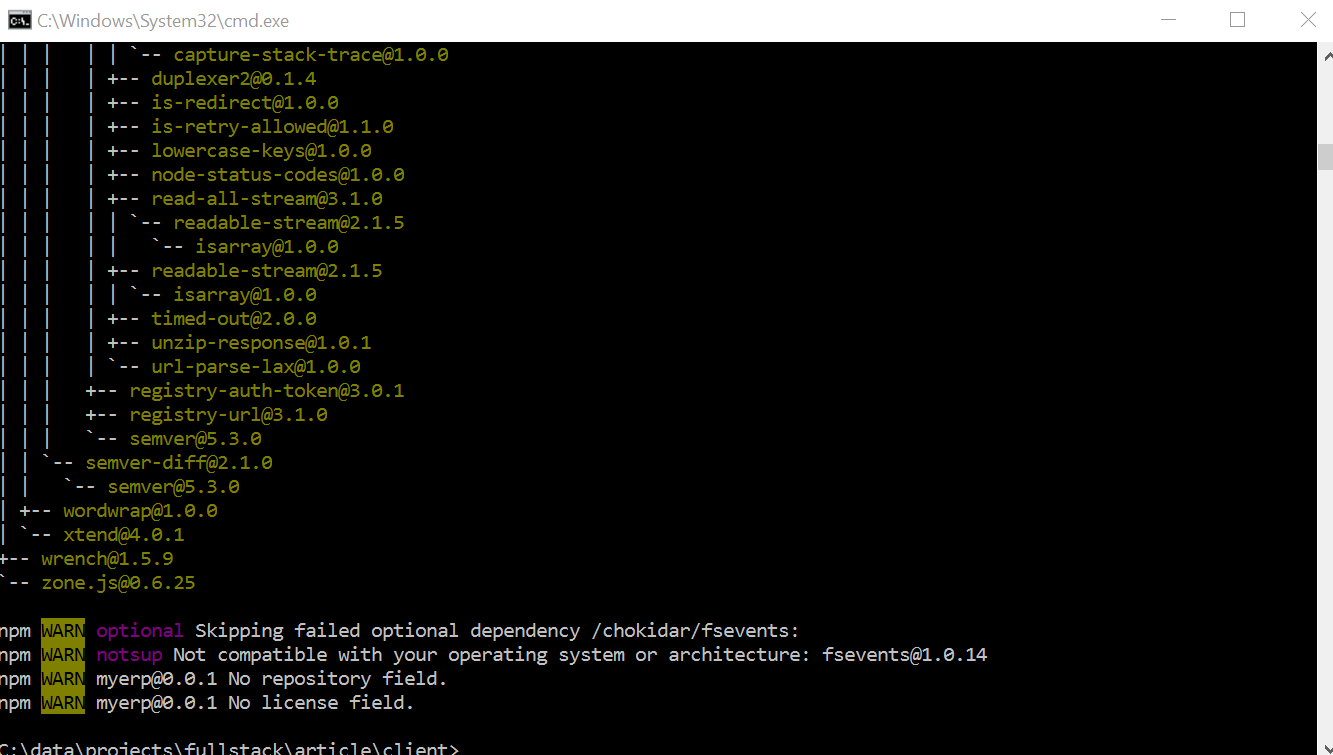
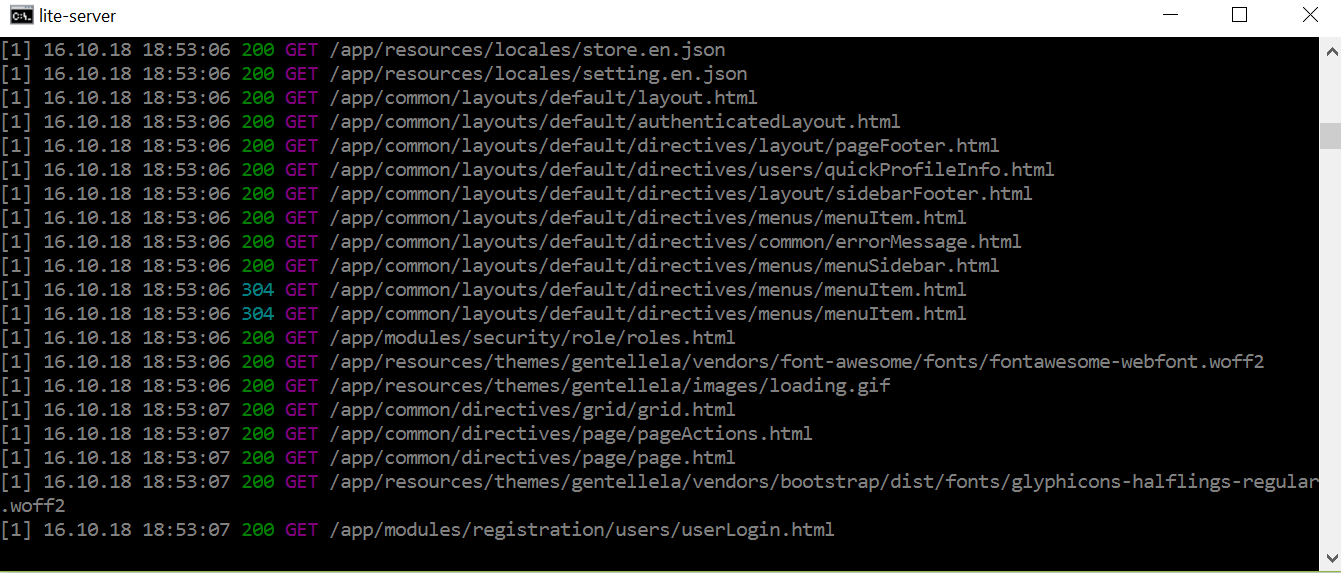
- Use “npm start” to run the app:
Output in console:
Output on the browser:
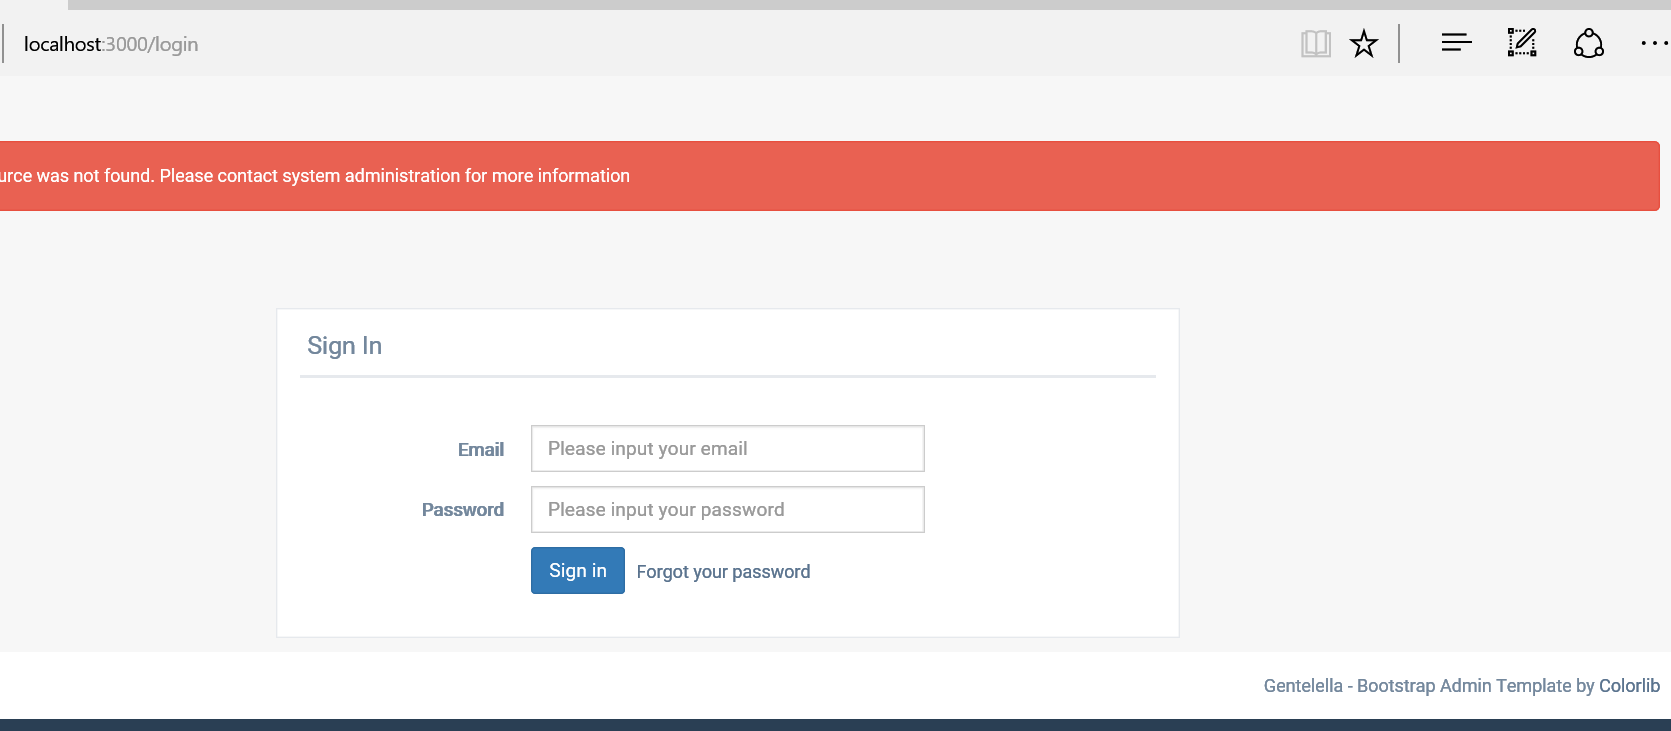
To this point, we can run the client successfully

Run API

- For the first run, We need to update the connectionstring in app.common\configurations\configuration.(debug|release).config
- Open Api project in visual studio (2015).
- Press f5 to run the Api on IIS Express, we will see the output on browser:
Config the default route, will remove this error page.

The First Look At The App

- We need to login before continueing:
- Login with tu.tran@yahoo.com/123456, we will see the default page as below (this can be changed in application configuration):

List of Roles Page

In this section, we will go through how we implement new page using my code.

Analyse

As my habit, I analyse the page before implement, this will help us recognise:
  • Listing out The steps we need to do to complete the page.
  • Figure out the missing information, so we can ask for help immediatedly.
  • Think about the flow of logic from the client to server side, from UI to repository. So the written code will be nicer. For this, many of my co-workers, they try to write the code first, and debug it after that. When something wrong, it changes your behavior, and we try to change the code to make it works. this may break the logic flow and the code is not follow the convention, architecture was used in the app. This will raise some new potential issues in the future and the code is hard for manteance.
After analysing the page, we figure out the list of things need to be completed as below:
On client:
+ Create new module (called security), I will discusss more pros and cons on how to modular the application.
+ Register route for Roles component (page in angular was called component) and appropriated menu item information (sub menu on th eleft panel)
+ Import and register this setting module with application config.
+ Create component files (html file for UI, ts file for logic handling and ts for view model of that component).
+ Implemnet the UI of Roles component
+ Implement logic of Roles component (also calling to server and getting data)
+ Implement service for this page (service willmake the call to REST api for getting the list of permission).
On Api:
+ Add new controller called RolesController for handling request related to Role.
+ Add RoleService and RoleRepository for getting the list of Roles (I use multi-layers architecture in this case)
+ Add entity into appropriated DbContext.
Ok, Now we will go through step by step in detail.

Implement client

In this section, <root> folder is the folder of client code (the path to "client" folder).
  1. Create new module (called security). as the convention of the app, we create new module.ts file in "<root>/app/modules/secutiry/_share/config" as photo below:
and route.ts file
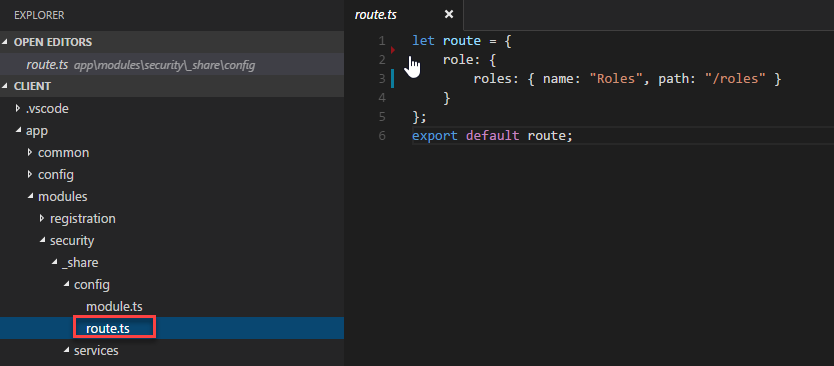
In this file, we will provide the setting information for security module, such as: list of sub menu items, routing in module, ...
  1. Register route for Roles component (page in angular was called component) and appropriated menu item information (sub menu on th eleft panel). Add this line into the module.ts file created in above step.
  1. Import and register this setting module with application config. This will register the security module in the application, show the module and its sub menu items will be displayed on the left panel.
The sytem will auto register routes in security module for us automaticly.
  1. Create component files (html file for UI, ts file for logic handling and ts for view model of that component).
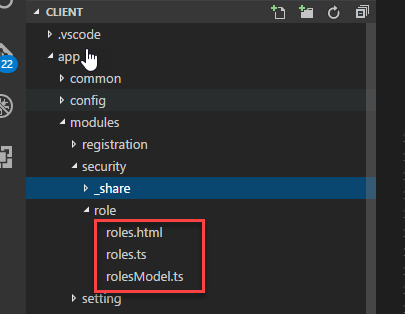
  1. Implemnet the UI of Roles component, there are some directives already created, we use in this article. I will explain more detail in other article how to implement those directives in other articles.
In this html, we use:
  • "grid" directive, for displaying the list of roles. there are some events we can passnig the handlers and  columns of grid in mode.options property.
  • "page-action" directive, this will dispaly the "Add Role" on the list of Roles as photo below:
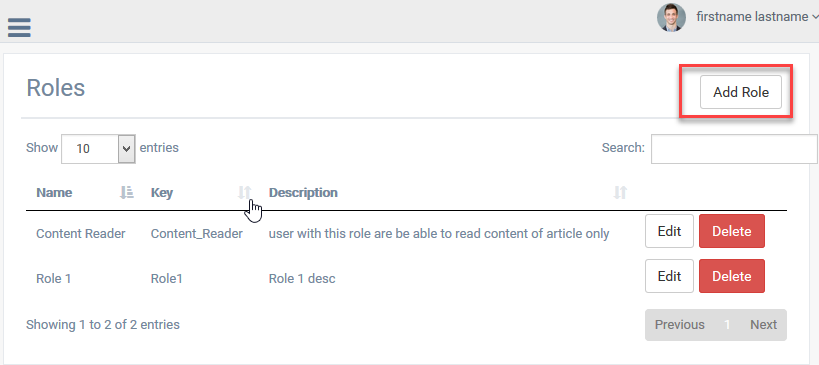
  • page, page-header, page-content directives, this is the structure of the page in my framework.
  1. Implement logic of Roles component (also calling to server and getting data)
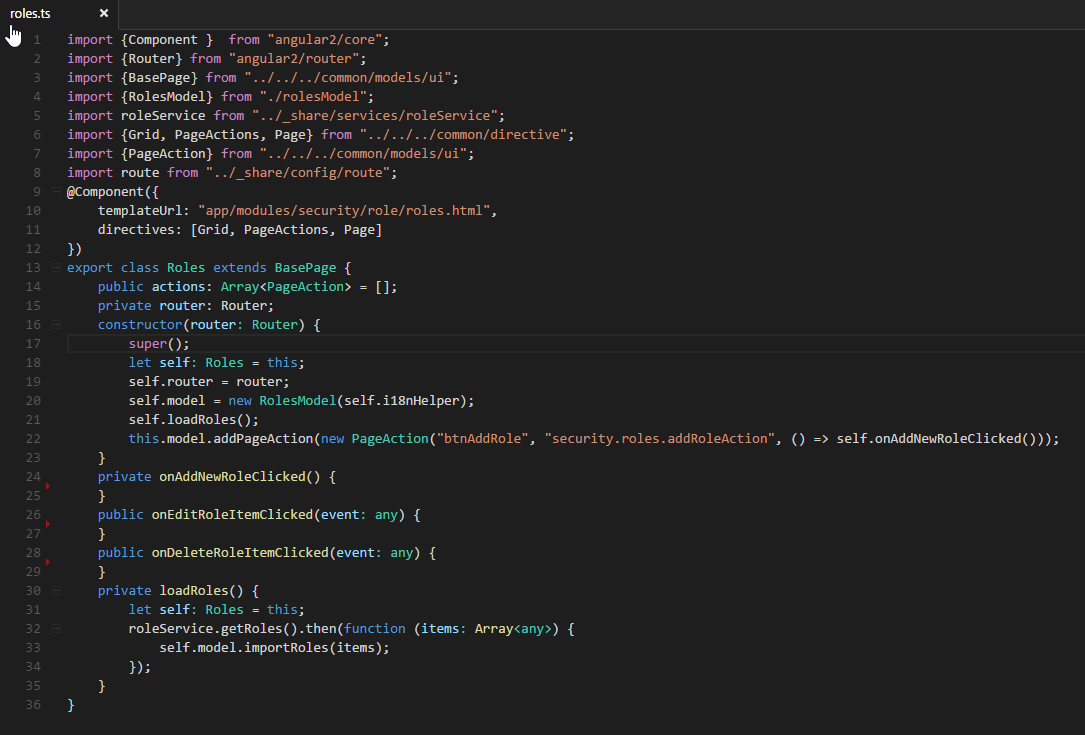
For declare new componnet we need to:
  • Specify the template file for the component (line 9).
  • Declare the number of directives were used in component html file (line 11). Is the directive was not declare here, it will not be redered in roles.html file and angular will consider its tag (<page-action/>, <grid />) as html tag
  • Declare new Roles class inherit  from BasePage.
  • Declare the model for the component. each component should have its own view model, this help us reducing the complexity of roles.ts file.
  • Getting data from api by calling appropriated method of roleService. We move this to service and let the roles.ts focus on the behavior of the page.
Note: we pass i18nHelper into constructor of RolesModel. this will be used for resolving the lable of grid columns base on the current languages (multi-language supported).
  1. Implement service for this page (service willmake the call to REST api for getting the list of permission).
This is just a simple call to REST api for getting the list of roles. For more information about IConnection, see <root>/app/common/connectors/RESTConnector.ts

Implement Api

In this section, <root> folder is the folder of api code (the path to "api" folder).
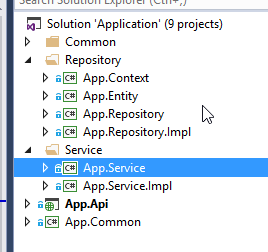
  1. Api project structure:
  • App.Common: this contains the common code can be used everywhere in the app
  • App.Api: this is public REST api that client side can call.
  • App.Service: this contains all service interfaces and its appropriated DTOs.
  • App.Service.Impl: this only contains implementation of appropriated interface in App.Service.
  • App.Repository: this contains all repository interfaces. Each repository only operates on 1 entity in database.
  • App.Repository.Impl: this only contains implementation of appropriated interface in App.Resitory.
  • App.Entity: This contains all entities of the app.
  • App.Context: Currently, this containts the all DbContexts in the app, as we use EF framework. I intend to merge this with the App.Entity in the future.
Note: The communication between the layer (such as: App.Api -> App.Service => App.Repository), we use the interface only.

  1. Add new controller called RolesController for handling request related to Role.
As the convention of the app, we create new RolesController in "App.Api/Features/Security"
namespace App.Api.Features.Security
{
    [RoutePrefix("api/roles")]
    public class RolesController : ApiController
    {
        [HttpGet]
        [Route("")]
        public IResponseData<IList<RoleListItemSummary>> GetRoles()
        {
            IResponseData<IList<RoleListItemSummary>> response = new ResponseData<IList<RoleListItemSummary>>();
            try
            {
                IRoleService roleService = IoC.Container.Resolve<IRoleService>();
                IList<RoleListItemSummary> roles=roleService.GetRoles();
                response.SetData(roles);
            }
            catch (ValidationException ex)
            {
                response.SetErrors(ex.Errors);
                response.SetStatus(System.Net.HttpStatusCode.PreconditionFailed);
            }
            return response;
        }
    }
}
I think the code is rather simple. From controller we call "GetRoles" of the appropriated service interface and get the list of roles (dto).
IoC will return the concrete instance of that service.
In App.Service.Impl, we have boostrap.cs file, this is the place for registering the service interface and its concrete implementation.
namespace App.Service.Impl
{
    public class Bootstrap : App.Common.Tasks.BaseTask<IBaseContainer>, IBootstrapper
    {
        public Bootstrap():base(App.Common.ApplicationType.All)
        {
        }
        public void Execute(IBaseContainer context)
        {
            context.RegisterSingleton<App.Service.Security.IRoleService, App.Service.Impl.Security.RoleService>();
        }
    }
}
  1. Add IRoleService and RoleService for getting the list of Roles (I use multi-layers architecture in this case)
namespace App.Service.Security
{
    public interface IRoleService
    {
        System.Collections.Generic.IList<RoleListItemSummary> GetRoles();
    }
}

namespace App.Service.Impl.Security
{
    internal class RoleService : IRoleService
    {
        public IList<RoleListItemSummary> GetRoles()
        {
            IRoleRepository repository = IoC.Container.Resolve<IRoleRepository>();
            return repository.GetItems<RoleListItemSummary>();
        }
    }
}
Note:
  • We should define appropriate DTOs for each action, as most cases, we just get some properties of entity and this will help the code easier for mantaince in future.
  • The RoleService class was delared as internal, not a public class. So outside of this dll can not create instance of this class

  1. Add IRoleRepository and RoleRepository for getting the list of Roles
namespace App.Repository.Secutiry
{
    public interface IRoleRepository: App.Common.Data.IBaseContentRepository<Role>
    {
    }
}

namespace App.Repository.Impl.Security
{
    internal class RoleRepository: BaseContentRepository<Role>, IRoleRepository
    {
        public RoleRepository() : base(new App.Context.AppDbContext(App.Common.IOMode.Read))
        {
        }

        public RoleRepository(IUnitOfWork uow) : base(uow.Context as IMSSQLDbContext)
        {
        }
    }
}
Note: The same as RoleService, RoleRepository class also was delared as internal. So only the interface can be used outside of this project.
  1. Add entity into appropriated DbContext:
namespace App.Entity.Security
{
    public class Role:BaseContent
    {
        public IList<Permission> Permissions { get; set; }
        public Role():base()
        {
            this.Permissions = new List<Permission>();
        }
        public Role(string name, string desc, IList<Permission> permissions): this() {
            this.Name = name;
            this.Key = App.Common.Helpers.UtilHelper.ToKey(name);
            this.Description = desc;
            if (permissions == null) { return; }
            this.Permissions = permissions;
        }
    }
}

namespace App.Context
{
    public class AppDbContext : App.Common.Data.MSSQL.MSSQLDbContext
    {
        public AppDbContext(IOMode mode = IOMode.Read) : base(new App.Common.Data.MSSQL.MSSQLConnectionString(), mode)
        {
        }
        public System.Data.Entity.DbSet<Role> Roles { get; set; }
    }
}

Summary

In this article, I provider you an overview about how to get the list of roles and display them on the ui.
In next article, we continue with how to create and update roles, and go  into more detail of framework (such as: project structure, directives, ....).

License

This article, along with any associated source code and files, is licensed under The Code Project Open License (CPOL)

Monday, November 28, 2016

Subaru Legacy Headlight Replacement 9007 HB5

Subaru Legacy Headlight Replacement 9007 HB5

9004 / HB1 does NOT fit.


Subaru Style:9007 / HB5

Fits 2001 Subaru Legacy
1998-2004 GT; 4 Cyl 2.5L;
1998-2002 GT Limited; 4 Cyl 2.5L;
1999-2004 L; 4 Cyl 2.5L;

2012-2015 Mazda 5 USES h11

Thursday, October 27, 2016

ASP.NET MVC Hotel Booking System Using AngularJS

ASP.NET MVC Hotel Booking System Using AngularJS

In this article, we will learn how to create a simple web based Hotel Room Booking System, using MVC, AngularJS, and WebAPI.

Using AngularJs, ASP.NET MVC, Web API and EntityFramework to build NLayered Single Page Web Applications

Using AngularJs, ASP.NET MVC, Web API and EntityFramework to build NLayered Single Page Web Applications

see codeproject

http://www.codeproject.com/Articles/791740/Using-AngularJs-ASP-NET-MVC-Web-API-and-EntityFram

In this article, I'll show you how to develop a Single-Page Web Application (SPA) from ground to up using the following tools:
  • ASP.NET MVC and ASP.NET Web API as web framework.
  • Angularjs as SPA framework.
  • EntityFramework as ORM (Object-Relational Mapping) framework
  • Castle Windsor as Dependency Injection framework.
  • Twitter Bootstrap as HTML/CSS framework.
  • Log4Net for logging, AutoMapper for object-to-object mapping.
  • And ASP.NET Boilerplate as startup template and application framework.
ASP.NET Boilerplate [1] is an open source application framework that combines all of these frameworks and libraries to make you start easily to develop your application. It provides us an infrastructure to develop applications in best practices. It naturally supports Dependency Injection, Domain Driven Design and Layered Architecture. The sample application also implements validation, exception handling, localization and responsive design.

Wednesday, September 7, 2016

Scrum vs Waterfall / Project Manager

Scrum

  • Requirements are not fully known
  • Scrum master may not be a programming expert
  • Project Backlog (list of features/tasks)
  • Sprint Backlog (list of features done in this time period)


Glossarry

  • Estimating
  • Product Backlog
  • Prioritized product backlog
  • Product Owner
  • Release Backlog
  • Scrum Master - Project manager who knows nothing about programing and is not more skilled than team members.
  • Stories
  • Subject matter expert
  • Team member
  • User
  • Velocity

Waterfall

  • Sequential 
  • Complete Requirements
  • Complete Functional Spec / Prototype
  • Complete Design
  • Complete Schedule and Staff
  • Development / Test
  • Alpha sort of working 
  • Beta nearly complete
  • Release
Glossary

  • Project manager

Intro to Agile Scrum in Under 10 Minutes
What is Scrum? Agile Scrum in detail... by Rajamanickam

from: http://www.leanagiletraining.com/agile/waterfall-versus-scrum-how-do-they-compare
WATERFALL VERSUS SCRUM: HOW DO THEY COMPARE?
MARCH 24, 2012
I have recently been asked for advice on how to compare Waterfall (WF) and Scrum.  This is a hard question in some ways: the best way to compare will depend on the person you are talking to.  Another problem is that few people do ‘pure’ waterfall in actual practice. And the variations of Waterfall are many.

Still here are some thoughts that occur to me.  We think these statements often need explanation, but they can be useful as a start for a discussion, eg, ‘should we move from waterfall to Scrum?’

***

Scrum has a prioritized Product Backlog (mainly by Business Value), from which one could execute the Pareto Rule.
WF tends to assume the 100% – 100% rule.   And tends to order the building of the product mainly by technical dependencies or by what the geeks want to do first.

Scrum uses adaptive planning.
WF tries to keep to the initial plan.

Scrum gets feedback from working software early (first sprint, in 2 weeks) and often (every sprint).
WF does not have working software until very late in the whole dev cycle.

WF assumes we know ‘everything’ upfront.
Scrum assumes there is lots we don’t know (yet), and focuses on maximizing learning throughout the project.

WF tries to minimize change (a change control board for any requirements changes, for example).
Scrum tries to maximize the benefits of good change (eg, learning), and minimize the negative impact of bad change.

Scrum assumes change is normal, and anyway much of it can’t be controlled usefully.
WF assumes change is bad and can be controlled (usually).

WF puts most responsibility on the PM.
Scrum puts most responsibility on the small dedicated Team.
(WF uses a diffuse work group, with only the PM with clear overall responsibility.)

WF assumes the PM should plan the work.
Scrum assumes it is best if the Team plans its own work and re-plans.

WF prefers ‘planning from the center’ (e.g., by the PM).  And the workers just execute what they are given.
Scrum prefers more self-organization, and using the full ‘complex adaptive system’ (a tight thinking adaptive Team).

Scrum optimizes business value, time to market and quality.
WF optimizes conformance to schedule and budget.

WF’s typical problem is analysis paralysis and being late. Scrum addresses these.
People using Scrum often err in not thinking quite enough up-front….an easier problem to fix, we think.

When people do WF they typically are thinking: “If I just follow the process and the plan, all will be well.”
Scrum tries to force the Team to think for themselves, in their specific situation. Hence, it is a bare framework of things that are essential for every effort. Always other things, in addition to Scrum, must be done.

WF has weak controls (eg, conformance to schedule and budget).
Scrum has strong and frequent controls (e.g., did you all get all those features done this past 2 weeks?)…which enables faster improvement.

Notes:
Unprofessional people often say they are doing ‘Scrum.’  Above we are talking about vigorous professional Scrum, not ‘cowboy Scrum’ or ScrumButt.

Good people forced into WF typically use agile-scrum ideas to make it really work.  Above we are talking about ‘true’ Waterfall. While ‘true’ Waterfall rarely exists, we think that one can still see that the ideas and practices of Waterfall, as much as they remain in real practice, impede progress compared to Agile.

Final comment: These are not all the statements one could make.  There probably are other useful comparisons. Your feedback is very welcome.

Monday, August 8, 2016

3D Graphics Teapot

3D Graphics Teapot


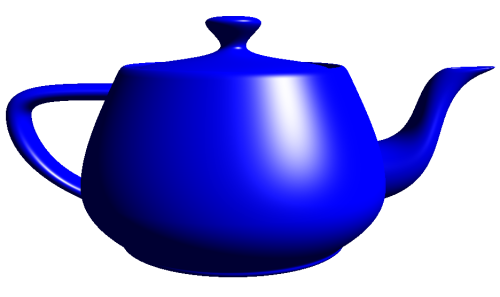
How to model a teapot
https://en.wikibooks.org/wiki/OpenGL_Programming/Modern_OpenGL_Tutorial_07
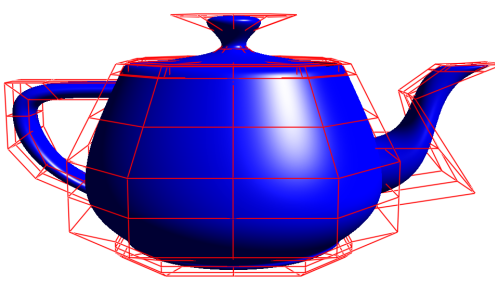
It's madeof 32 bezier patches and you can easily 

Code to do teapot in C++
Bézier Curves and Surfaces: the Utah Teapot
http://www.scratchapixel.com/lessons/advanced-rendering/bezier-curve-rendering-utah-teapot

find it if you google for "utah teapot" 

I have some old class code from fall 2001 that does teapots via Bezier 
patches: 
http://www.cs.unc.edu/~vogel/COMP236/program3/index.html 

Original teapot data

https://sjbaker.org/wiki/index.php?title=The_History_of_The_Teapot


The Teapot DataSet

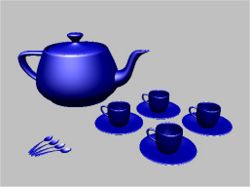
NewellTeaset.jpg

"There is no spoon"
The teapot is made from nine patches - some reflected in two axes , others in one axis only. 
Rim:
  { 102, 103, 104, 105,   4,   5,   6,   7,
        8,   9,  10,  11,  12,  13,  14,  15 }
  Body:
    {  12,  13,  14,  15,  16,  17,  18,  19,
       20,  21,  22,  23,  24,  25,  26,  27 }
    {  24,  25,  26,  27,  29,  30,  31,  32,
       33,  34,  35,  36,  37,  38,  39,  40 }
  Lid:
    {  96,  96,  96,  96,  97,  98,  99, 100,
      101, 101, 101, 101,   0,   1,   2,   3 }
    {   0,   1,   2,   3, 106, 107, 108, 109,
      110, 111, 112, 113, 114, 115, 116, 117 }
  Handle:
    {  41,  42,  43,  44,  45,  46,  47,  48,
       49,  50,  51,  52,  53,  54,  55,  56 }
    {  53,  54,  55,  56,  57,  58,  59,  60,
       61,  62,  63,  64,  28,  65,  66,  67 }
  Spout:
    {  68,  69,  70,  71,  72,  73,  74,  75,
       76,  77,  78,  79,  80,  81,  82,  83 }
    {  80,  81,  82,  83,  84,  85,  86,  87,
       88,  89,  90,  91,  92,  93,  94,  95 }

  Vertices:

    {  0.2000,  0.0000, 2.70000 }, {  0.2000, -0.1120, 2.70000 },
    {  0.1120, -0.2000, 2.70000 }, {  0.0000, -0.2000, 2.70000 },
    {  1.3375,  0.0000, 2.53125 }, {  1.3375, -0.7490, 2.53125 },
    {  0.7490, -1.3375, 2.53125 }, {  0.0000, -1.3375, 2.53125 },
    {  1.4375,  0.0000, 2.53125 }, {  1.4375, -0.8050, 2.53125 },
    {  0.8050, -1.4375, 2.53125 }, {  0.0000, -1.4375, 2.53125 },
    {  1.5000,  0.0000, 2.40000 }, {  1.5000, -0.8400, 2.40000 },
    {  0.8400, -1.5000, 2.40000 }, {  0.0000, -1.5000, 2.40000 },
    {  1.7500,  0.0000, 1.87500 }, {  1.7500, -0.9800, 1.87500 },
    {  0.9800, -1.7500, 1.87500 }, {  0.0000, -1.7500, 1.87500 },
    {  2.0000,  0.0000, 1.35000 }, {  2.0000, -1.1200, 1.35000 },
    {  1.1200, -2.0000, 1.35000 }, {  0.0000, -2.0000, 1.35000 },
    {  2.0000,  0.0000, 0.90000 }, {  2.0000, -1.1200, 0.90000 },
    {  1.1200, -2.0000, 0.90000 }, {  0.0000, -2.0000, 0.90000 },
    { -2.0000,  0.0000, 0.90000 }, {  2.0000,  0.0000, 0.45000 },
    {  2.0000, -1.1200, 0.45000 }, {  1.1200, -2.0000, 0.45000 },
    {  0.0000, -2.0000, 0.45000 }, {  1.5000,  0.0000, 0.22500 },
    {  1.5000, -0.8400, 0.22500 }, {  0.8400, -1.5000, 0.22500 },
    {  0.0000, -1.5000, 0.22500 }, {  1.5000,  0.0000, 0.15000 },
    {  1.5000, -0.8400, 0.15000 }, {  0.8400, -1.5000, 0.15000 },
    {  0.0000, -1.5000, 0.15000 }, { -1.6000,  0.0000, 2.02500 },
    { -1.6000, -0.3000, 2.02500 }, { -1.5000, -0.3000, 2.25000 },
    { -1.5000,  0.0000, 2.25000 }, { -2.3000,  0.0000, 2.02500 },
    { -2.3000, -0.3000, 2.02500 }, { -2.5000, -0.3000, 2.25000 },
    { -2.5000,  0.0000, 2.25000 }, { -2.7000,  0.0000, 2.02500 },
    { -2.7000, -0.3000, 2.02500 }, { -3.0000, -0.3000, 2.25000 },
    { -3.0000,  0.0000, 2.25000 }, { -2.7000,  0.0000, 1.80000 },
    { -2.7000, -0.3000, 1.80000 }, { -3.0000, -0.3000, 1.80000 },
    { -3.0000,  0.0000, 1.80000 }, { -2.7000,  0.0000, 1.57500 },
    { -2.7000, -0.3000, 1.57500 }, { -3.0000, -0.3000, 1.35000 },
    { -3.0000,  0.0000, 1.35000 }, { -2.5000,  0.0000, 1.12500 },
    { -2.5000, -0.3000, 1.12500 }, { -2.6500, -0.3000, 0.93750 },
    { -2.6500,  0.0000, 0.93750 }, { -2.0000, -0.3000, 0.90000 },
    { -1.9000, -0.3000, 0.60000 }, { -1.9000,  0.0000, 0.60000 },
    {  1.7000,  0.0000, 1.42500 }, {  1.7000, -0.6600, 1.42500 },
    {  1.7000, -0.6600, 0.60000 }, {  1.7000,  0.0000, 0.60000 },
    {  2.6000,  0.0000, 1.42500 }, {  2.6000, -0.6600, 1.42500 },
    {  3.1000, -0.6600, 0.82500 }, {  3.1000,  0.0000, 0.82500 },
    {  2.3000,  0.0000, 2.10000 }, {  2.3000, -0.2500, 2.10000 },
    {  2.4000, -0.2500, 2.02500 }, {  2.4000,  0.0000, 2.02500 },
    {  2.7000,  0.0000, 2.40000 }, {  2.7000, -0.2500, 2.40000 },
    {  3.3000, -0.2500, 2.40000 }, {  3.3000,  0.0000, 2.40000 },
    {  2.8000,  0.0000, 2.47500 }, {  2.8000, -0.2500, 2.47500 },
    {  3.5250, -0.2500, 2.49375 }, {  3.5250,  0.0000, 2.49375 },
    {  2.9000,  0.0000, 2.47500 }, {  2.9000, -0.1500, 2.47500 },
    {  3.4500, -0.1500, 2.51250 }, {  3.4500,  0.0000, 2.51250 },
    {  2.8000,  0.0000, 2.40000 }, {  2.8000, -0.1500, 2.40000 },
    {  3.2000, -0.1500, 2.40000 }, {  3.2000,  0.0000, 2.40000 },
    {  0.0000,  0.0000, 3.15000 }, {  0.8000,  0.0000, 3.15000 },
    {  0.8000, -0.4500, 3.15000 }, {  0.4500, -0.8000, 3.15000 },
    {  0.0000, -0.8000, 3.15000 }, {  0.0000,  0.0000, 2.85000 },
    {  1.4000,  0.0000, 2.40000 }, {  1.4000, -0.7840, 2.40000 },
    {  0.7840, -1.4000, 2.40000 }, {  0.0000, -1.4000, 2.40000 },
    {  0.4000,  0.0000, 2.55000 }, {  0.4000, -0.2240, 2.55000 },
    {  0.2240, -0.4000, 2.55000 }, {  0.0000, -0.4000, 2.55000 },
    {  1.3000,  0.0000, 2.55000 }, {  1.3000, -0.7280, 2.55000 },
    {  0.7280, -1.3000, 2.55000 }, {  0.0000, -1.3000, 2.55000 },
    {  1.3000,  0.0000, 2.40000 }, {  1.3000, -0.7280, 2.40000 },
    {  0.7280, -1.3000, 2.40000 }, {  0.0000, -1.3000, 2.40000 },

As you can probably guess, the numbers in the patch array index into the vertex array.
If you look again at the photo of the real teapot, you can see that it's quite a bit taller than the classic computer teapot.

he original teapot data has no bottom. Some of the data sets that are out there (depressingly, this includes the one in the GLU and GLUT distributions) have added a bottom - but that is definitely 'impure'. Here is the data for the bottom:
  Bottom:
    { 118, 118, 118, 118, 124, 122, 119, 121,
      123, 126, 125, 120,  40,  39,  38,  37 }

  Vertices 118..126:
    {  0.0000,  0.0000, 0.00000 }, {  1.4250, -0.7980, 0.00000 },
    {  1.5000,  0.0000, 0.07500 }, {  1.4250,  0.0000, 0.00000 },
    {  0.7980, -1.4250, 0.00000 }, {  0.0000, -1.5000, 0.07500 },
    {  0.0000, -1.4250, 0.00000 }, {  1.5000, -0.8400, 0.07500 },
    {  0.8400, -1.5000, 0.07500 }

How to use timer for animation

http://stackoverflow.com/questions/24217988/using-android-timers-to-implement-graphical-movement

The most common approach I have seen is somewhat different. It's more typical to update the animation while preparing to render each frame, and base the update on the amount of time that has passed since the last frame.
Since distance is velocity multiplied by time, you do this by assigning a velocity vector to each of your objects. Then when it's time to update the animation, you take the time difference since the last update, and the increment you apply to your positions is the time difference multiplied by the velocity. The velocity is constant as long as you just use a linear motion, but can also change over time for more complex animations, e.g. due to gravity, collision with other objects, etc.
If you're using OpenGL on Android, you're probably using a GLSurfaceView for your rendering. By default, the GLSurfaceView will already invoke your rendering function continuously, up to 60 fps if your rendering can keep up with the display refresh rate.
What you roughly do is keep the time when the last frame was rendered as a member variable in your GLSurfaceView.Renderer implementation. Then each time onDraw() is called, you get the new time, and subtract the last frame time from this time to get the time increment. Then you store away the new time in your member variable, multiply the time increment by the velocity, and add the result to your positions.
After the positions are updated, you render your objects as you normally would.
To give you the outline, the following is a slightly adapted piece of (pseudo-)code I copied from my answer to a similar question (Android timing in OpenGL ES thread is not monotonic):
public void onDrawFrame(GL10 gl) {
    currentTime = SystemClock.elapsedRealtime()
    deltaTime = currentTime - lastFrameTime
    lastFrameTime = currentTime
    update animation based on deltaTime
    draw frame
}
Where lastFrameTime is a member variable, currentTime a local variable.
shareimprove this answer

Here is how one grad student renders a teapot:

http://vis.berkeley.edu/~joshea/projects/bezier/


The basic OpenGL functions for curves are (in C):

    glMap1f(target, u_min, u_max, stride, order, point_array); glEnable(target); glEvalCoord1f(u);
The first two are setup functions. The first, glMap1f(), is how we specify all the control information (points, colors, or whatever). The target is the kind of control information you are specifying and the kind of information you want generated, such as:
    GL_MAP1_VERTEX_3, a vertex in 3D GL_MAP1_VERTEX_4, a vertex in 4D (homogeneous coordinates GL_MAP1_COLOR_4, a RGBA color GL_MAP1_NORMAL, a normal vector GL_MAP1_TEXTURE_COORD_1, a texture coordinate. (We'll talk about textures in a few weeks.)
The u_min and u_max arguments are just the min and max paramater, so they are typically 0 and 1, though if you just want a piece out of the curve, you can use different values. For example, to get the middle fifth of the curve, you could give u_min=0.4 and u_max=0.6.

Open Source: OpenGL ES Curve Library For iOS


OpenGL ES does not have a built in library for curve generation, and while the formulas for creating curves can be readily found there are so many different types and it is always nice to have everything done for you. Core Animation provides a few different types of curves, but there are many more. I found out about some great open source code that performs the necessary calculations for 22 different types of curves.  In case you’re wondering why you might need this data — it is extremely useful for animation.  Also, this is not only an OpenGL curve library, you can use the functions for different Core Animation curves also.
The library is from Jeff Lamarche, co-author of Beginning iPhone 3 Developmentand More iPhone 3 Development books you can find out more about the functions, and see some of the examples of the curves at:
More Animation Curves Than You Can Shake A Stick At
Further information on how to use the functions can be found at the above link.